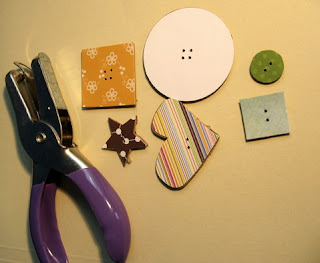
Step 1: Select your button base, it can be cardstock, patterned paper, fabric, etc. Using that base product it is easiest to cut out basic shapes using paper punches. Or hand cut hand cut using templates if you don't have paper punches available.
Step 2: Locate some cardboard and use it to give the buttons their depth and dimension. Use the paper punch or template to cut out the cardboard backers the same as you did in step one.
Step 3: Using gel adhesive or a glue stick adhere the button bases to the cardboard pieces.
Step 4: Now you need to locate a couple real buttons to use as templates for the hole placement on your faux buttons. Set the real buttons on top and centered over your faux buttons and using a needle, straight pin or seam ripper mark the holes.
Step 5: Now use a small hole punch to punch the button holes at the marked spots.
Step 6: This is the fun step, bling it up! I tried all different ways of decorating my buttons including: stamps, ink, marker, stickles, gemstones, rub-ons, thread, ribbon and bakers twine. Get creative.
Step 7: Enjoy your one of a kind custom button embellishments!
Here is Patricia's finished layout! Isn't it gorgeous!
We hope this gives you a few ideas and we would love to hear what you think!


Liking the buttons, thanks for that idea. I saw some on youtube that had Glossy Accents on for dimension - another idea for you. x
ReplyDeleteThis is great! Thanks for sharing this with us!
ReplyDelete